How to measure three-dimensional objects, including silver, ceramics, glass & sculpture like an expert
Accurately measuring irregularly shaped three-dimensional objects can be challenging. This guide will give you the tools to accurately measure your decorative art and sculpture. Before handling them, make sure your hands are clean and dry.
The standard format for reporting measurements of three-dimensional items is as follows: Height x Width x Depth or Diameter.
Circumference, the distance around a circular item (such as a bowl or lamp shade), may also be measured if it applies to your object.
To begin, imagine putting a clear box or cube over your object. Now, measure the box – height first, then width, then depth (front to back).
Height: The vertical measurement from the base of an object to the top, its tallest point. If your object is mounted on a base, plinth, stand or pedestal, measure the height of the object including the base, and then measure it again without the base.
Width: The horizontal measurement of an object at its widest point, farthest left and right of center. If an object has handles or other details that protrude from the body, measure just the body, and then measure the object again, including the handles.
Depth: In this context, depth is the distance from front to back, or the horizontal measurement of an object’s protrusion into space, perpendicular to the object’s width.
Diameter: This measurement only applies to circular items. This is the measurement of the width of the circle at its largest point. Imagine bisecting the circular area into two equal parts with your ruler. If you are measuring objects with circular components of variable sizes, such as a bowl or vase, take three measurements: the diameter of the bottom, the diameter of the widest point of the body, and the diameter of the rim.
Circumference: The distance around a circular object, such as a bowl, lamp shade or paper weight. Use a flexible measuring tool, such as a seamstress tape. Hold the tape at the largest point of the object and then encircle it with the tape. This measurement only applies to circular objects.
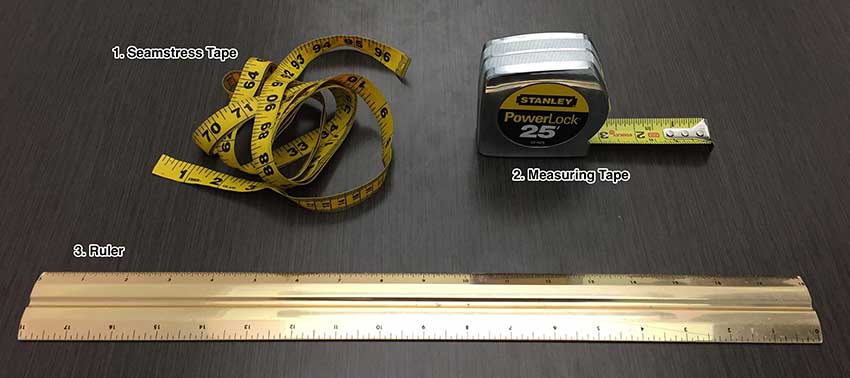
Basic Types of Measuring Tools:
- Seamstress tape: Soft and flexible, good for measuring circumference, three-dimensional objects or curved objects.
- Measuring tape: Rigid, can be hooked onto a frame or canvas, good for measuring straight items that are longer than one foot.
- Ruler: Rigid, good for measuring straight items smaller than one foot, particularly small items that can be laid directly on the ruler.
How To Measure:
Imagine the clear box over your object.
For items that are not circular, such as sculptures, measure the Height, Width and Depth of the object.
- Place the “Zero” end of your measuring tool at the end of your object.
- Make sure the end of your ruler is flush (in line) with your object.
- Adjust your ruler so that it is aligned with your object. The ruler should be straight and parallel to the object.
- Move to the opposite side of the object you are measuring and read the ruler.
For items that have circular components, such as bowls, vases or paperweights, measure the Height, Width, Diameter and Circumference of the object:
- Place the “Zero” end of your measuring tool at the end of your object.
- Make sure the end of your ruler is flush (in line) with your object.
- Adjust your ruler so that it is aligned with your object. The ruler should be straight and parallel to the object.
- Move to the opposite side of the object you are measuring and read the ruler.
- Use a flexible tool such as a seamstress tape to measure the circumference, the distance around the object.